Manage Workstations
The Remote Desktops section lists your organization’s computers and composites, and lets you view their status, assign users, and edit their information.
Access: inventory_2 Inventory > tv Remote Desktops.
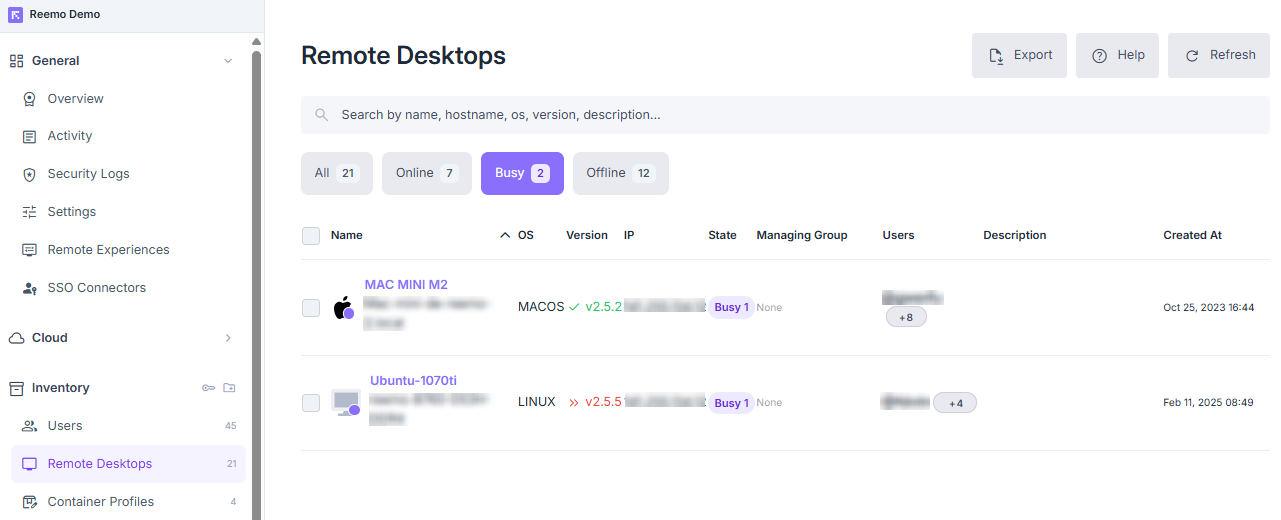
Overview of remote desktops.
The columns display:
Name and Hostname
Type: Computer or Composite
OS and version
IP address
Status (Online, Offline, Busy, Partial)
Associated group
Assigned users
Creation date
Above the list, the All / Online / Busy / Partial / Offline tabs show a live count per status, and the All / Computers / Composites toggle filters the list by resource type — see Manage Composites to manage composite resources.
View a Computer Profile
Access: inventory_2 Inventory > tv Remote Desktops > computer name.
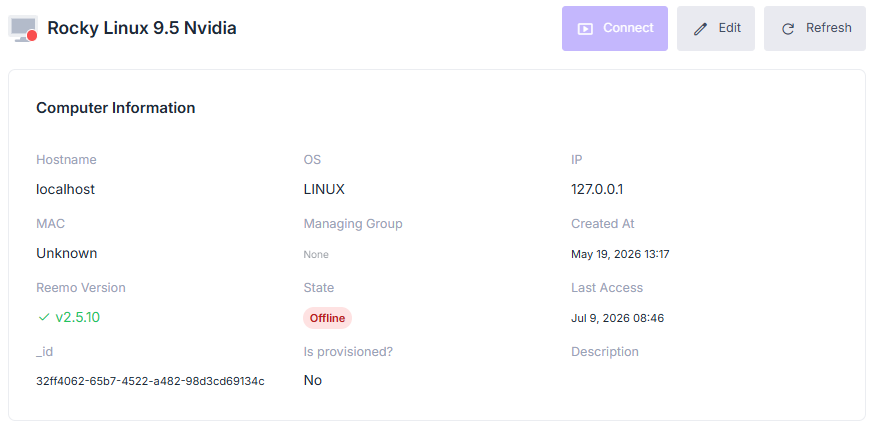
Computer profile showing main information.
The profile displays:
Hostname, OS, IP, and MAC address.
Managing Group, Created At, and Last Access.
Reemo Version — see Resource Status Indicators for the up-to-date/outdated indicator.
State: real-time status (Online, Offline, Busy — session in progress).
Is provisioned?: whether the workstation was created through a provisioning workflow.
Description.
_id: the resource’s internal identifier, useful when contacting support.
Credential: the secret assigned for auto-logon on this workstation, if any — see Configure Auto-Logon below.
Available actions
Connect — opens a remote session to this workstation (only available when the machine is Online).
Edit — modify the computer’s Name, Description, Control level (Full Control or View Only — the computer-level default, see User Settings below), MAC Address, and Icon, and override its Clipboard, File Transfer, Printer, and Sessions settings. Click Update to confirm.
Refresh — updates the machine’s information and status.
Available tabs
Users: users assigned to this workstation — see Assign Users to a Computer and Managing Assigned Users below.
Approvers: restrict access to this workstation by requiring approval — users who must approve a connection request before it is granted — see Restrict Access to a Machine below.
Groups: groups associated with this workstation.
Collections: collections associated with this workstation — see Collections.
Sessions: remote session logs — see Activity (Sessions).
Rights Review: access tree for this workstation — see Rights Review.
Security Logs: history of security events related to this workstation.
Delete: permanently deletes this workstation.
Assign Users to a Computer
Open the computer’s profile.
In the Users tab, click Assign users.
Select one or more users in the selection window.
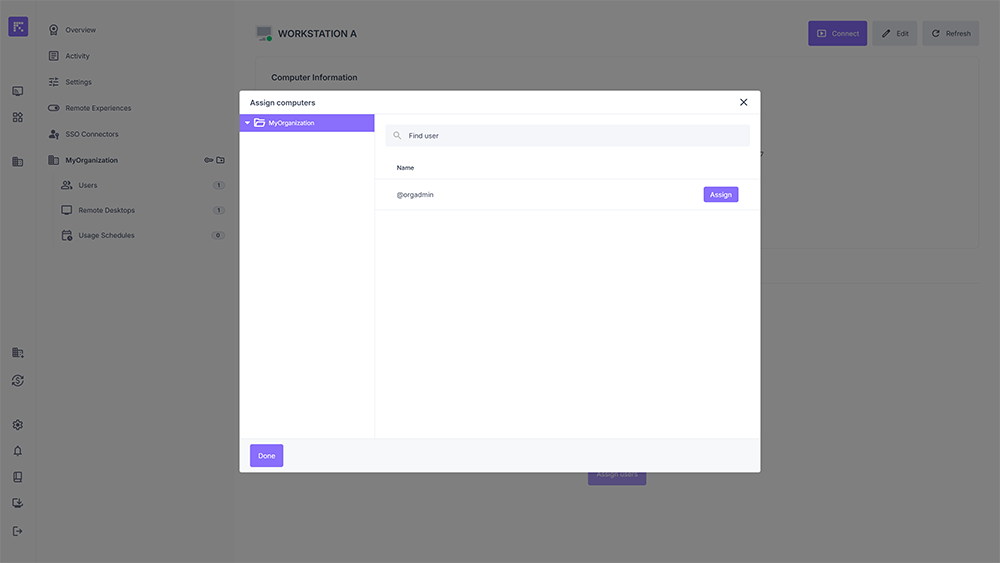
User selection window for assignment.
Click Assign, then close the window.
The assigned users now appear in the computer’s Users tab.
Managing Assigned Users
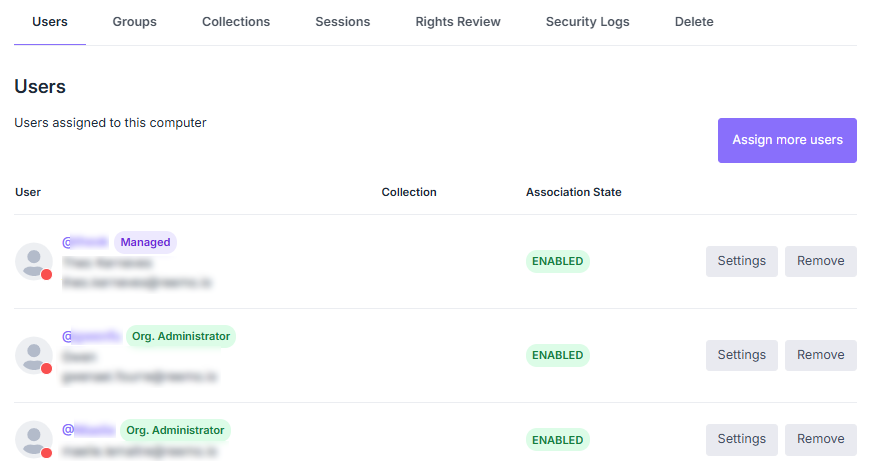
Users tab listing assigned users.
Each user listed in the Users tab displays:
Role badge: account-level info about the user, next to their username (e.g. Managed, Org. Administrator, when applicable).
Collection: the collection associated with this assignment, if any. See Collections.
Association State: the current status of the assignment (e.g. Active).
Control level badge: shown only when this user’s control level is overridden for this computer (e.g. View Only) — see User Settings below.

Control level badge (View Only) next to the association state.
Two actions are available per user:
Settings: configures this user’s settings for this workstation, see User Settings below.
Remove: unassigns the user from the workstation.
User Settings
Click Settings next to an assigned user to configure the Computer-User assignment, the last level of the settings cascade.
Reemo settings cascade through five levels — each can inherit a setting from the level above, and lock it for the levels below.
Level |
Inherit from above |
Lock for levels below |
|---|---|---|
Instance |
— |
Yes |
Organization |
Yes |
Yes |
Group |
Yes |
Yes |
Computer |
Yes |
Yes |
Computer-User assignment |
Yes |
— |
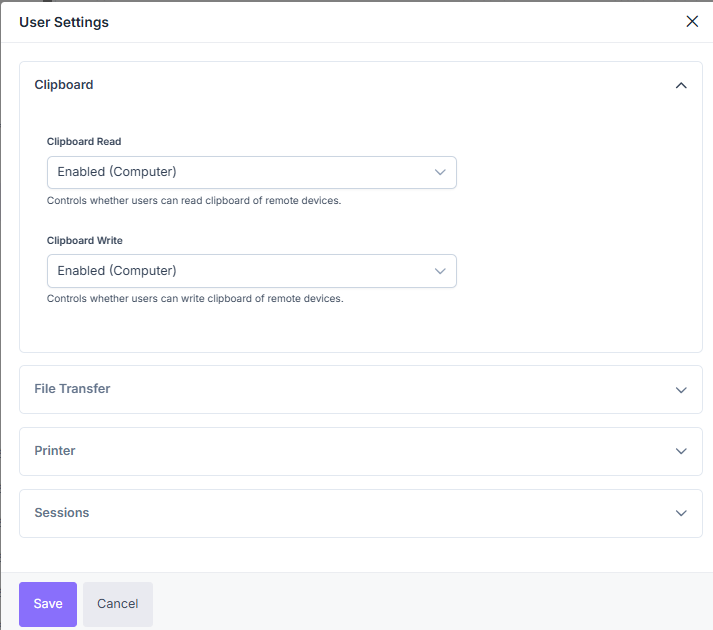
User Settings window.
At the top of the window, the Control level selector sets the effective level for this specific user-computer assignment:
Inherited from resource: combines the account-level default with the computer’s default, applying the account level first and the computer level next.
Full Control or View Only: overrides both the account and computer defaults for this assignment only, in either direction — e.g. an explicit Full Control here lifts a View Only defined on the user’s account.
Available categories: Clipboard (read/write), File Transfer, Printer, and Sessions. Each setting inherits from the Computer level by default (e.g. Enabled (Computer)) and can be overridden for this specific user.
Click Save to apply, or Cancel to discard.
See also
Rights Review — Visualize which users and collections have access to a remote desktop.
Restrict Access to a Machine
Assigning at least one approver to a workstation activates its approval workflow: users must then submit an access request and wait for approval before they can connect — see Requesting Access to a Restricted Resource for the end-user flow. Organization administrators bypass this workflow and connect directly; instance administrators do not — they follow it like standard users.
Note
As long as no approver is assigned, the Approvers tab indicates that this resource does not require approval, and connections remain direct.
Required approvals: the number of assigned approvers whose approval is needed before a request is granted (quorum). If a single approver rejects the request, it is denied immediately, regardless of any other pending approvals.
Request expiration (hours): how long a request submitted for this workstation stays open before expiring. Check Override to set a custom value for this resource instead of inheriting the organization’s default — see Security Settings.
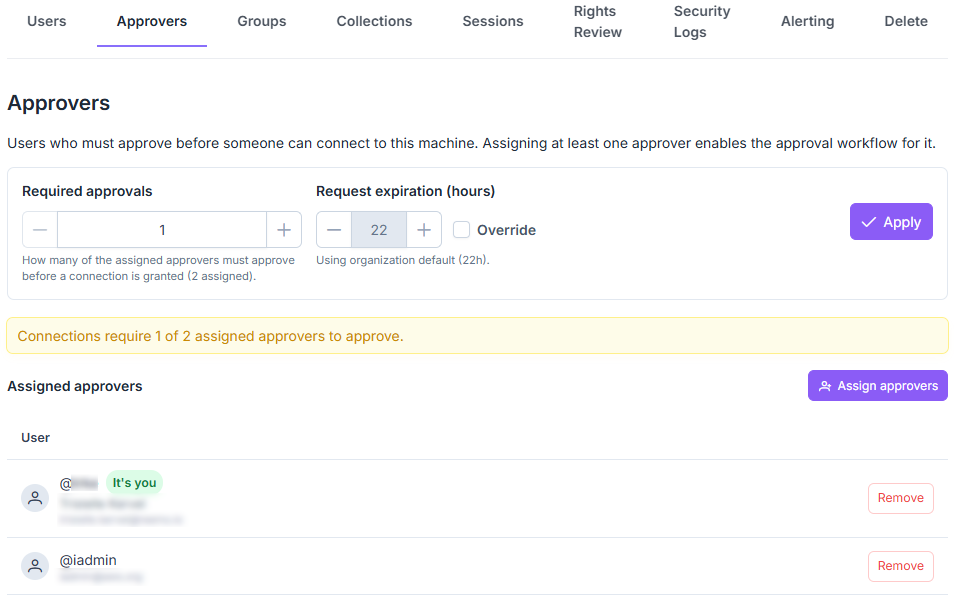
Approvers tab on a computer profile.
Assigning Approvers
Open the computer’s profile and go to the Approvers tab.
Click Assign Approvers.
Select one or more users in the selection window, then confirm.
The assigned approvers now appear in the Assigned Approvers table.
See also
Access Requests — Review and act on pending access requests across the organization.
Configure Auto-Logon
Assigning a credential to a workstation lets connecting users sign in to its remote OS session without having to know the login and password themselves.
Note
The credential itself must first be created under Inventory > Credentials, at the organization or instance level — see Manage Credentials.
Assigning a Credential
Open the computer’s profile and locate the Credential field.
Click Change.
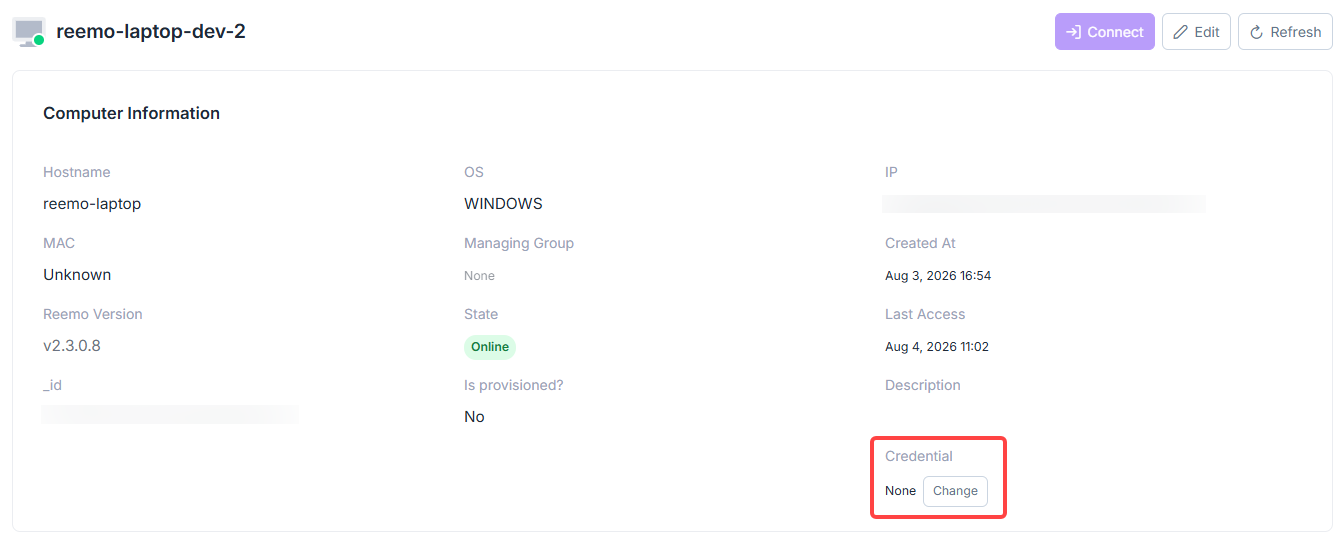
Credential field on a computer profile.
In the Assign Credential window, search for a credential and click Assign next to it.
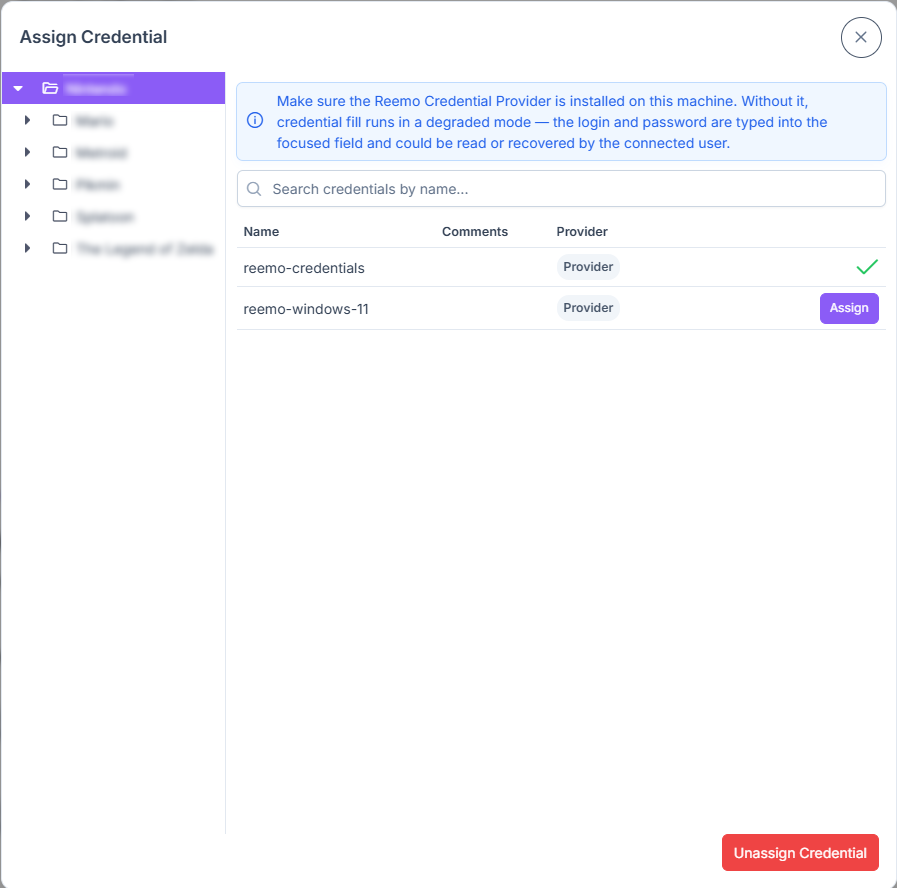
Assign Credential window.
The assigned credential’s name now appears in the Credential field. Click Unassign Credential to remove it.
Signing In in Degraded Mode
Degraded mode works on any OS and does not require any driver on the target machine.
Warning
In degraded mode, the login and password are typed as regular keystrokes into the focused field — they can be read or intercepted by the connected user.
Once a credential is assigned, connecting users see a toolbar notification:
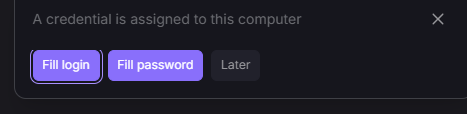
“A credential is assigned to this computer” notification.
Clicking Fill login or Fill password types the corresponding value into whichever field currently has focus on the remote screen. Click Later to dismiss the notification without filling anything.
Signing In in Full Mode (Windows)
Full mode requires the Reemo Credential Provider to be installed on the target Windows machine, and a credential of type Login configured with a login that resolves to an existing Windows or Active Directory account — Reemo does not create a dedicated account, it signs in to that existing one on the connecting user’s behalf. The login and password never transit through the connecting user’s side.
Important
The Reemo Credential Provider is provided on request. Contact your sales representative to activate this feature for your organization.
Note
In the credential’s Email or Username field, enter:
account-loginif the target machine’s hostname matches the account’s domain.DOMAIN\account-loginotherwise — for exampleMicrosoftAccount\your_email@outlook.comfor a Microsoft account, orAzureAD\your_email@company.comfor an Azure AD account.DOMAINcan also be the target machine’s hostname, for a local account.
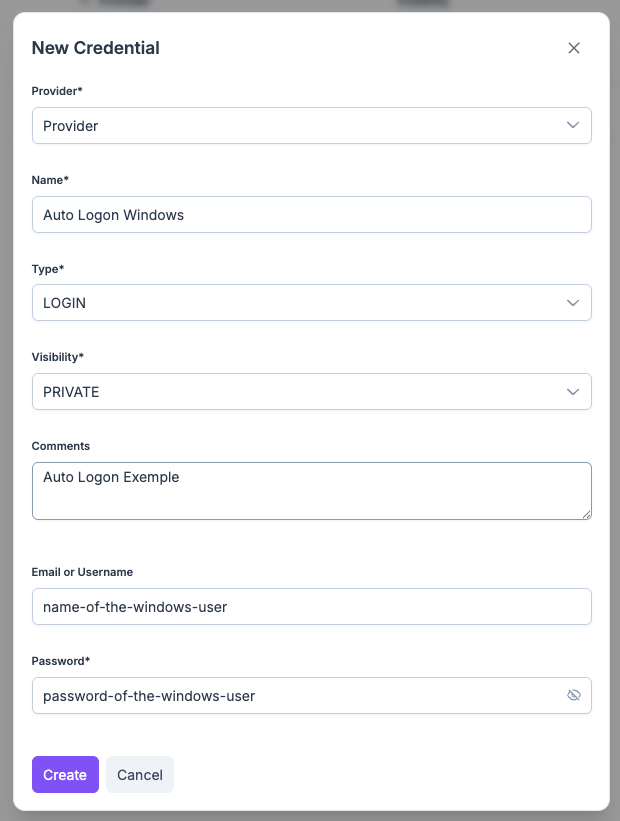
Example credential configured for Windows auto-logon.
On the Windows lock screen, this account then appears alongside the machine’s other accounts — the screenshots below use an example account named reemo-credentials.
There are two ways to sign in with this credential:
Via the sign-in notification — a notification appears asking “Sign in to <machine name> with the assigned credential?” with Login to session and Later buttons. Click Login to session to sign in immediately.
Tip
If you miss it, the notification disappears after about 30 seconds — reopen it at any time from the toolbar: open Settings > General > Credentials, then click Login to session. The generated sign-in token remains valid for 5 minutes; once it expires, this option disappears, and you need to reconnect to the session to get a new one.
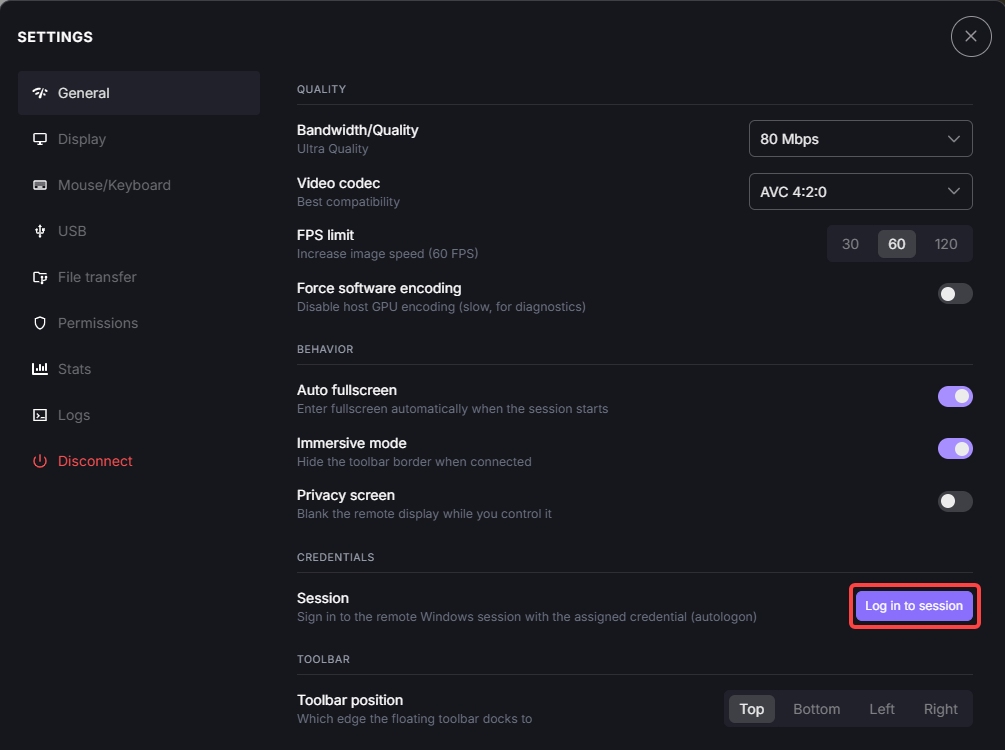
Login to session button in the toolbar’s Settings panel.
Directly from the lock screen — select the account configured for auto-logon (reemo-credentials in this example), then click Sign-in options to choose between the key icon (manual password entry) and the R icon (Sign in with Reemo).
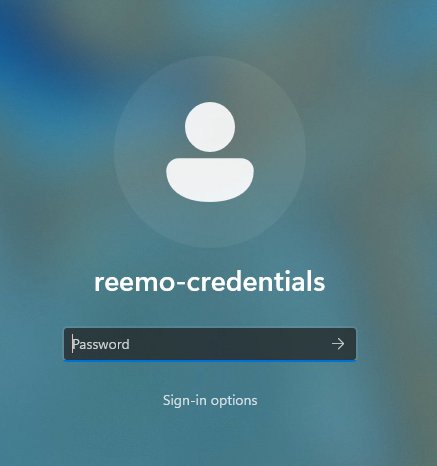
The reemo-credentials account selected, with Sign-in options.
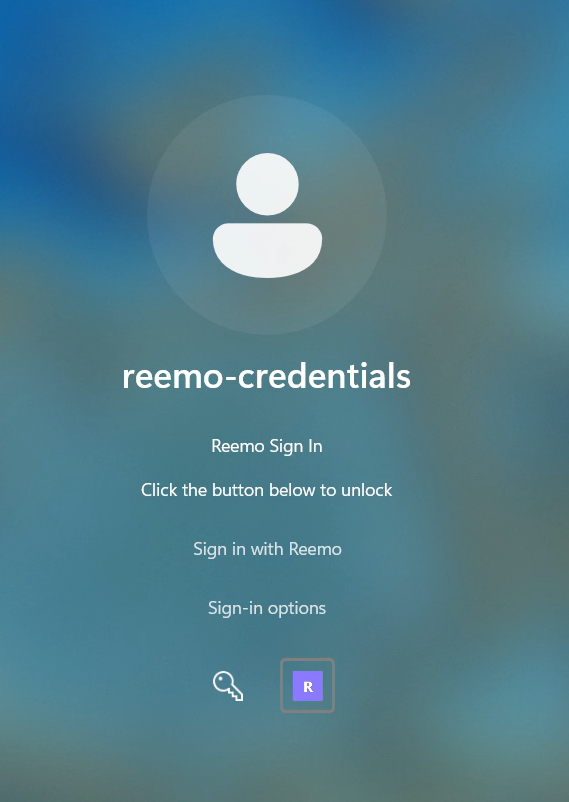
Sign-in options on the reemo-credentials tile.
Selecting the R icon displays Reemo Sign In — click Sign in with Reemo to unlock the session.