Container Management
Containers allow users to run isolated environments (e.g., secure browsing sessions or specific applications). They are based on Container Profiles that define their configuration and operating rules.
Important
Container Profiles
Container Profiles act as templates. They define the image, constraints, and options applied to the containers generated from them.
List of Profiles
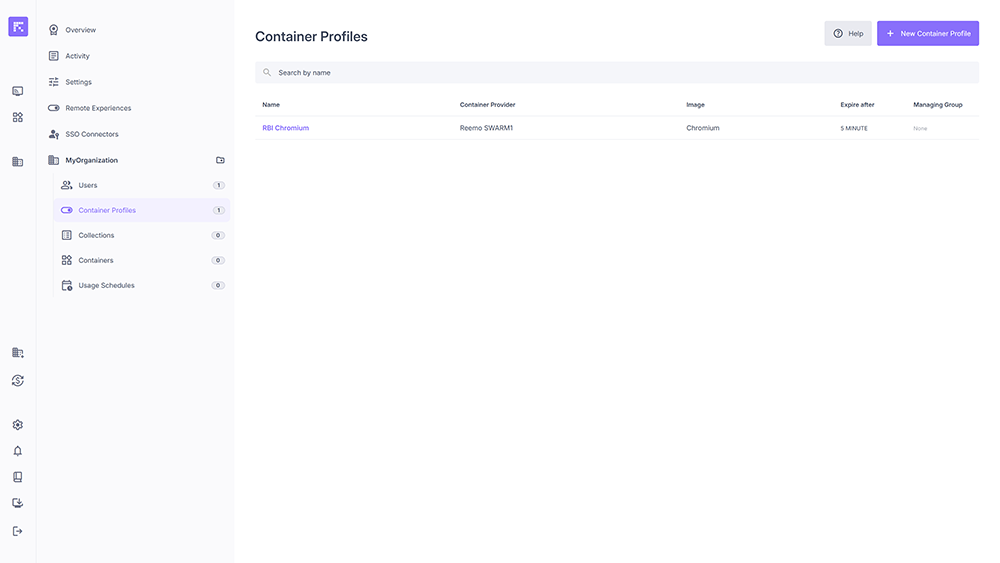
Overview of available container profiles.
The Container Profiles page lists all container profiles defined in the organization. Each table row displays the following information:
Name: the name of the Container Profile.
Container Provider: the infrastructure used to run the container (e.g. Reemo SWARM1).
Image: the base image used (e.g. Chromium).
Expire after: the time limit before the container automatically stops after disconnection.
Managing Group: the group responsible for managing the profile, if defined.
Created At: date and time when the profile was created.
This view allows quick verification of available profiles, their basic configuration, and governance status.
Create a New Profile
Go to the Container Profiles menu.
Click New Container Profile.
Fill in the following fields:
Provider and Image (required)
Name (profile name)
Expiration: delay after disconnection before automatic shutdown
Clipboard restrictions: enable/disable read and write access
Custom icon (SVG) (optional)
Constraints: placement rules (e.g. location)
Options: image deployment options
Note
These options depend on the selected image and are defined by the instance administrator who manages deployed images.
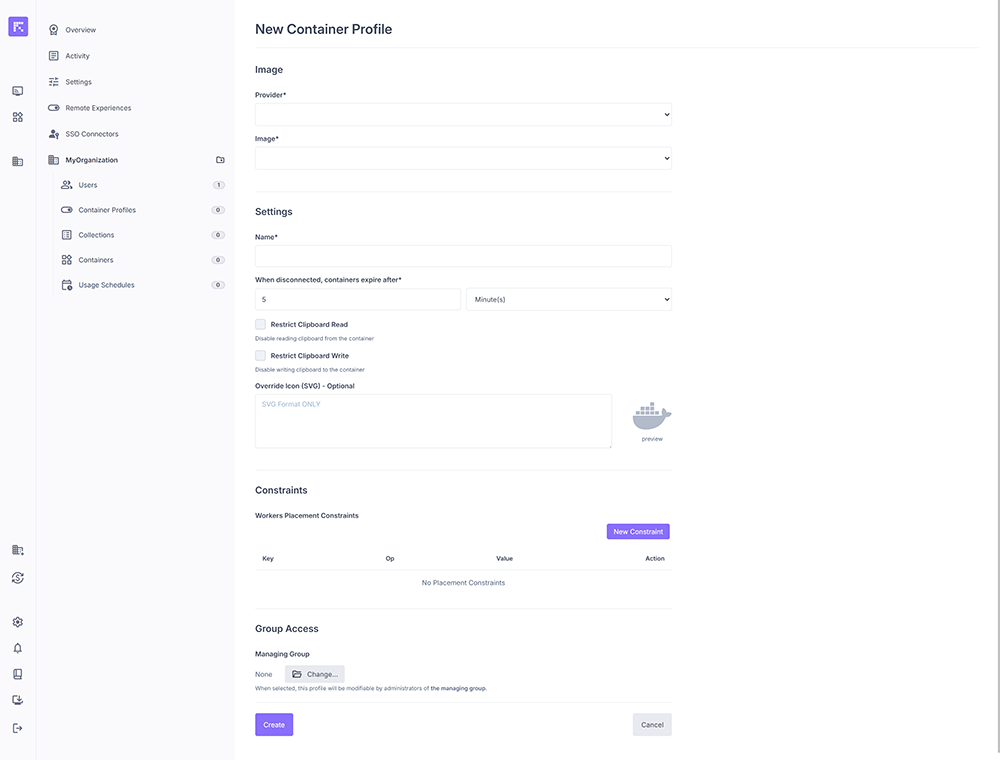
Container profile creation screen.
Edit a Profile
You can edit an existing profile to adjust its parameters (name, expiration, constraints, advanced options).
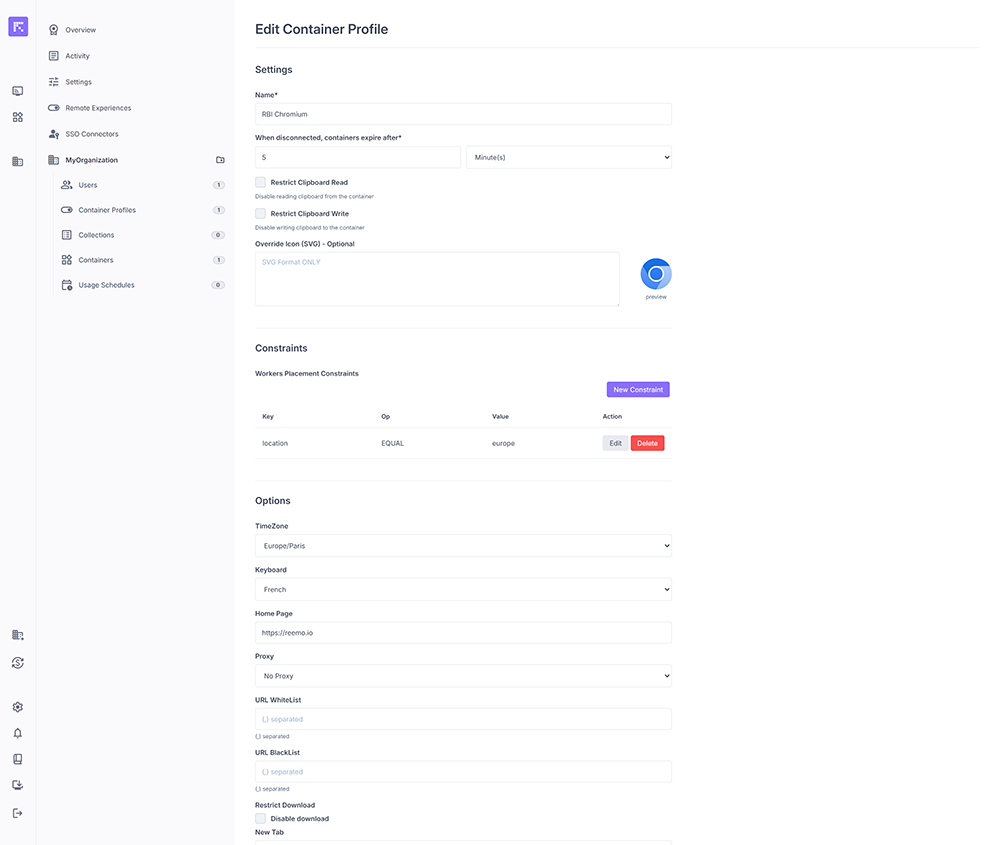
Editing a container profile with options and constraints.
Assign Users to a Profile
Users must be associated with a Container Profile in order to launch containers.
Open the container profile.
Click Assign users.
Select the users and confirm.
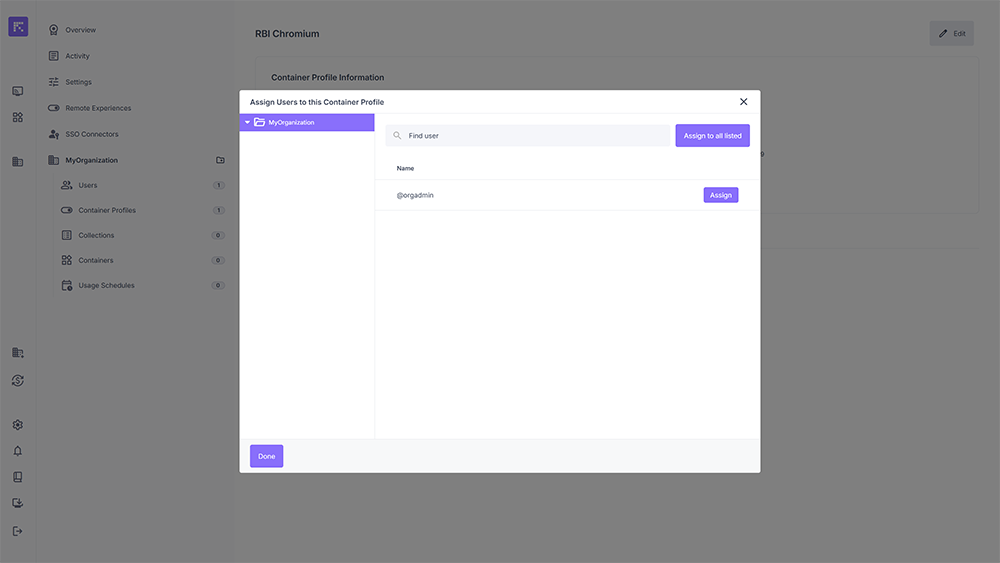
User assignment window for a profile.
Profile View
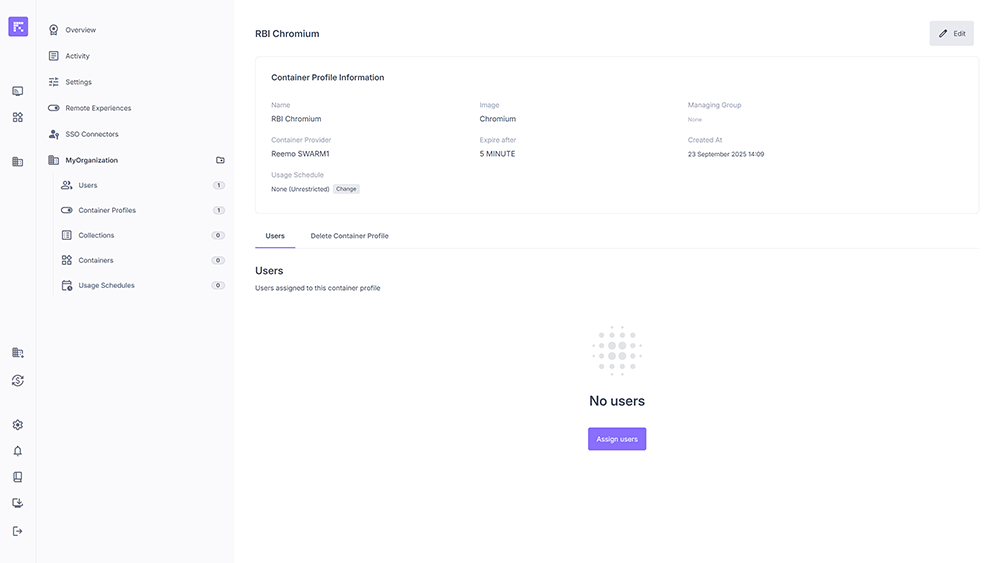
Information of a container profile (name, image, expiration, provider, managing group).
A Container Profile displays the following details:
Name: profile name.
Image: the image used to run the container (e.g. Chromium).
Container Provider: the infrastructure on which the containers will be deployed (e.g. Reemo SWARM1).
Expire after: maximum container lifespan after disconnection.
Managing Group: group responsible for the profile (if defined).
Usage Schedule: usage schedule applied to the profile (default: None = unlimited).
Created At: date and time of profile creation.
From this page, you can:
Edit profile parameters (name, image, constraints, advanced options, etc.).
Assign users to the profile.
Delete the profile from the organization if needed.
An additional tab shows the users associated with this Container Profile.
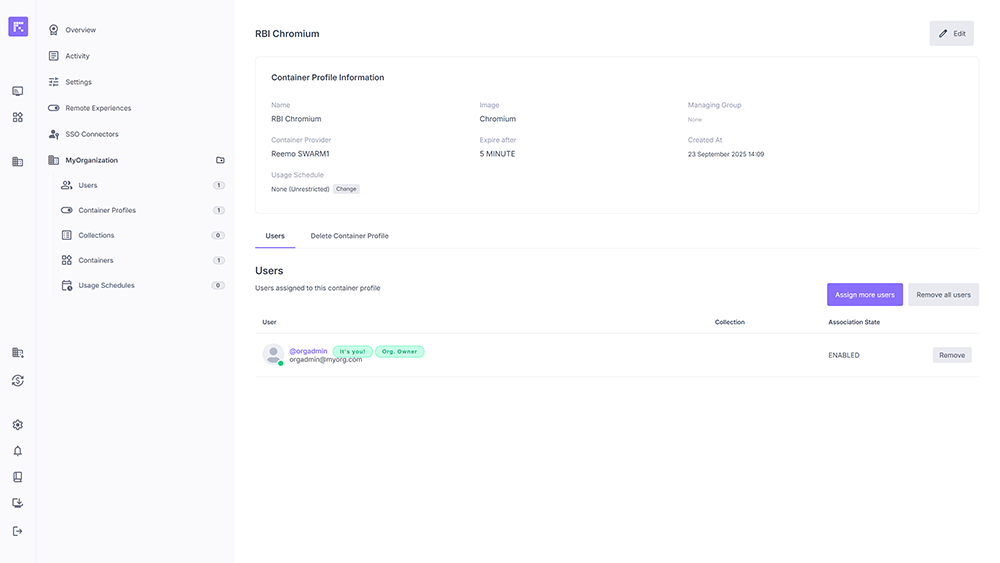
Container profile with assigned user.
Containers
Once Container Profiles are configured and assigned, users can launch containers. Each container represents a running instance visible in the Containers section.
List of Containers
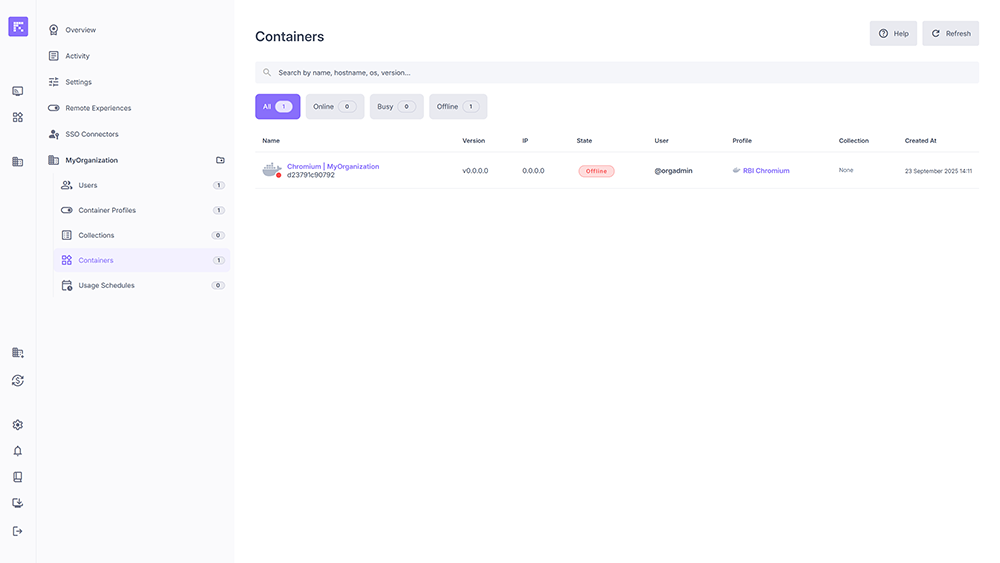
Overview of active or stopped containers.
The columns display:
Name and Hostname
OS and version
IP
Status (Online, Offline, Busy)
Used Profile
Associated Collection (if applicable)
Owning User
Creation Date
Container Profile View
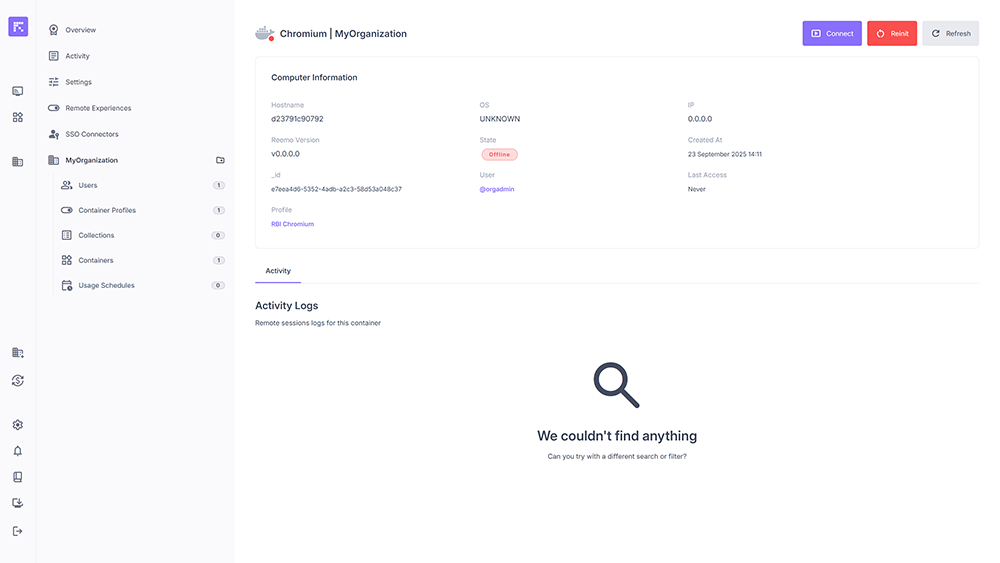
Container information (OS, status, user, associated profile, activity logs).
Container Collections
Assign Container Profiles to a Collection
A Collection does not directly contain containers but rather Container Profiles. By assigning one or more profiles to a Collection, you define which environments will be available to users associated with that Collection.
Open the desired Collection profile.
Click on the Container Profiles tab.
Press the Assign container profiles button.
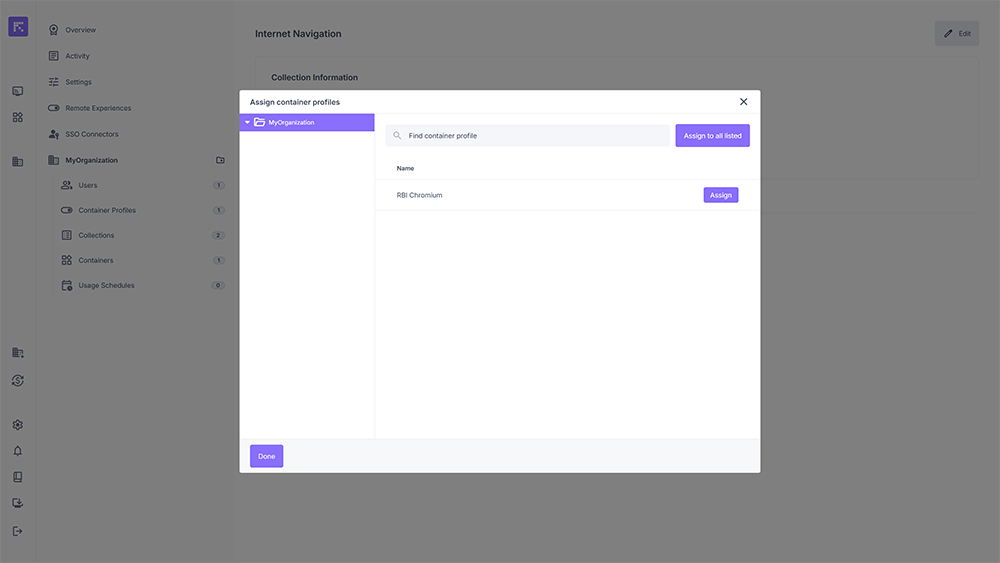
Selection window for adding Container Profiles to the Collection.
Select one or more container profiles from the list.
Click Assign to confirm.
The selected Container Profiles now appear in the Collection’s Container Profiles tab, displaying their key details (name, image, provider, expiration date, etc.).
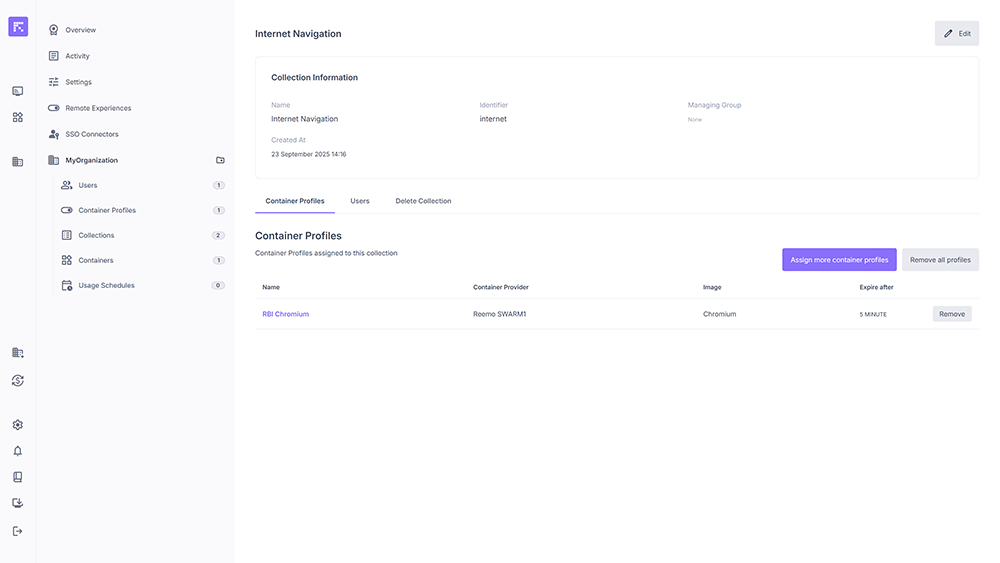
Container Profiles successfully assigned to a Collection.
A user must be assigned to a Collection to access the Container Profiles it contains.
Access rights and options remain those defined in the original Container Profile.
You can add or remove Container Profiles from a Collection at any time.
Summary
Container management is based on two main concepts:
Container Profiles: A container profile defines a container’s configuration (image, constraints, options, restrictions). It can be assigned directly to users to provide them with specific environments.
Collections: A collection groups one or more container profiles and assigns them to a set of users. This simplifies centralized management of standardized environments (e.g., “Internet Navigation”, “DevOps”, etc.).
In summary:
Use container profiles if you want to create and assign environments individually (one profile = one configuration).
Use collections if you want to manage sets of environments and distribute them easily to multiple users.