Remote Experiences
Create connection profiles that set the video quality, the session behavior and the toolbar of your users’ remote sessions.
Access: domain Organization > dashboard General > display_settings Remote Experiences.
A Remote Experience is a profile that customizes how users connect to remote computers or containers. You can adapt it to a network environment (for example ADSL, Fiber or Mobile) or to a video need (for example 4:4:4 color), then assign it to one or more users.
Tip
To apply a Default Remote Experience to all the users of the organization, see General Settings.
The Remote Experiences page lists all the profiles of your organization, each identified by a name. Click a profile to open its page: a summary of its settings, an Edit button and the Users and Delete tabs. You can create as many profiles as you need. Search by name, or click the Name or Created At column heading to sort the list.
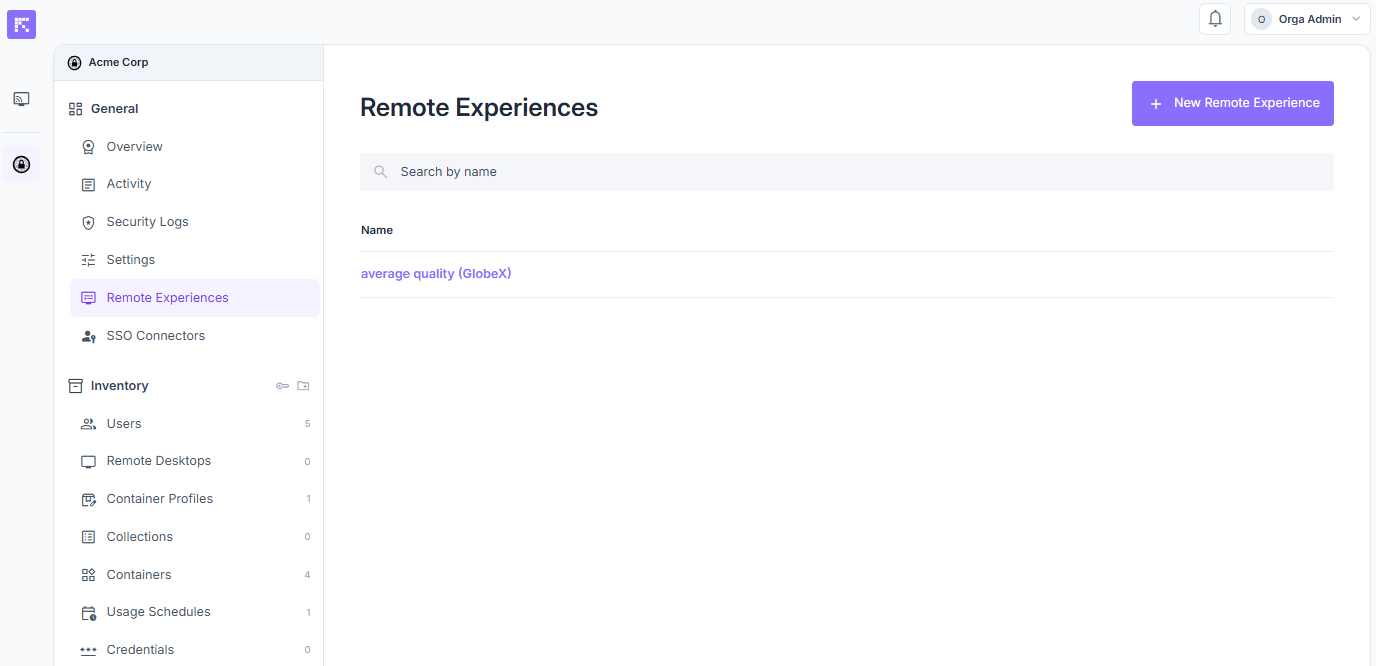
List of Remote Experiences
Create or Edit a Remote Experience
To create a profile, click New Remote Experience. To change an existing one, open it and click Edit.
Fill in the form (see Configure a Remote Experience).
Click Create or Update.
Assign Users
You can associate a Remote Experience with one or more users. Once assigned, users automatically use the settings of the profile for their connections.
Open the Remote Experience.
In the Users tab, click Assign more users.
In the window, choose a group in the tree or search for a user by username, name or email.
Click Assign next to each user to add. A check mark shows the users already assigned. To assign yourself, click Assign myself, next to the search box.
Close the window.
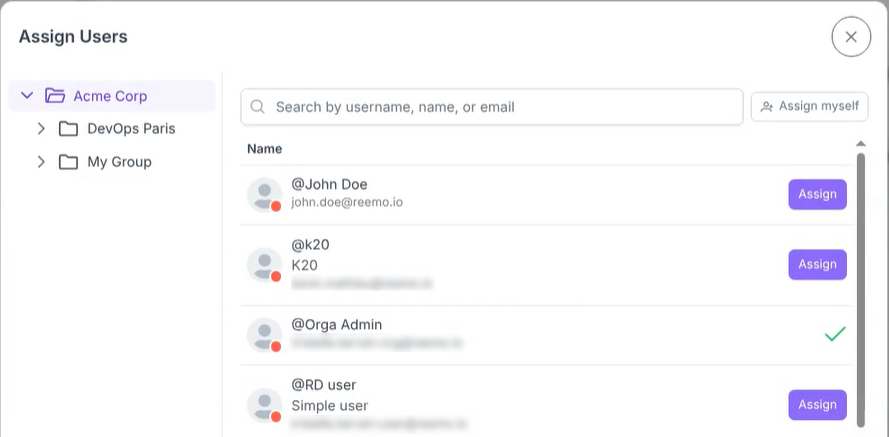
Assigning users to a Remote Experience
Remove a User
Open the Remote Experience.
In the Users tab, click Remove next to the user.
Delete a Remote Experience
Delete a Remote Experience that you no longer use.
Open the Remote Experience.
Open the Delete tab.
Click Delete remote experience.
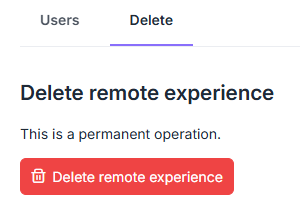
Delete tab of a Remote Experience
Warning
Deletion is permanent and results in the loss of the associated settings.
Configure a Remote Experience
Fill in the form from top to bottom. The values you choose are the defaults users start from. Each setting has its own lock, next to the field, which sets whether users can change it.
Name a Remote Experience
Give the profile a name that tells which use it fits.
Name: profile name (for example Mobile, ADSL).
Lock Settings
Decide what your users can adjust themselves and what you set for them. Two settings at the top of the form apply to the whole form:
Lock all settings: locks or unlocks every setting of the form at once. The box is partly checked when only some settings are locked or limited.
When users change an unlocked setting: what becomes of a setting a user has changed. This menu is greyed out when all settings are locked.
Keep their choice for the next sessions: the user finds their setting as they left it in the next session. A setting the user never changed follows the default value of the profile. A default value you change applies once to everyone, who can then change it again.
Go back to the default value at each session: the user’s changes last until the end of the session, then the setting returns to the default value.
Next to each field, a menu then sets the lock:
Unlocked: users can change the setting in the web client.
Limited: users choose a value between a minimum and a maximum that you set in the Minimum and Maximum lists (No minimum and No maximum by default). This lock is offered for Bandwidth, FPS and Quality level.
Locked: users see the setting in the web client but cannot change it.
For example, lock Bandwidth to impose the same bitrate on everyone, or limit it to let each user choose within a range that you define.

Limited lock on bandwidth, with a maximum of 10 Mbps.
Set Bandwidth, Priority, Video Format and FPS
Adapt the stream to the network and to the content users work on.
Bandwidth: bandwidth limit of the stream: Automatic, 2, 5, 7, 10, 20, 40, 80 or 200 Mbps. See Automatic Mode.
Priority: what gives way first on a slow network. Smoothness keeps the frame rate and accepts visible compression artifacts. Quality keeps the image sharp and lets the frame rate drop instead.
Quality level: from 1, the smoothest, to 5, the sharpest. Applies only when Priority is set to Quality.
Video Format: video codec used for the stream: AVC (H264) 4:2:0, AVC (H264) 4:4:4, HEVC (H265) 4:2:0 or HEVC (H265) 4:4:4.
FPS: frame rate (30, 60, or 120 FPS).
Note
Quality requires an up-to-date Reemo Service (the Reemo agent) on the remote computer and a WebRTC connection.
Note
HEVC (H265) 4:4:4 requires a compatible hardware encoder on the remote computer and a compatible browser: see Video Codec.
In the toolbar, go to General > Quality: see Priority.
Enable Build to lossless, Color depth and HDR
Improve text sharpness and color fidelity.
Build to lossless: makes the static areas of the screen lossless, for sharp text and exact colors. Disabled by default.
Color depth: 8 bits (default) or 10 bits, for smooth gradients without banding. With an AVC codec, 10 bits turns on Build to lossless.
HDR: HDR10 video for an HDR screen. It forces 10 bits and switches the format to HEVC (H265). It is not possible with a format locked to AVC (H264): the session then stays in SDR.
Note
10 bits, HDR and Build to lossless require an up-to-date Reemo Service on the remote computer (see Update).
In the toolbar, these settings are in General > Quality: see Combining Color Depth, Video Codec and HDR.
Set Fullscreen, Monitor Layout and Keyboard Mode
Decide what happens when a session starts and how the keyboard is sent.
Fullscreen on connect: switches to fullscreen mode as soon as the session connects. Enabled by default.
Load monitor layout on connect: restores, on connect, the screen layout already saved for the target computer, instead of prompting for it every session. Disabled by default.
Keyboard mode: how keys are sent to the remote computer. Virtual KeyCodes (default) sends the physical position of the key, and Unicode sends the character that is typed, for users whose keyboard layout differs from the host’s.
Note
Unicode has no effect on a Linux host, which always receives Unicode.
In the toolbar, fullscreen is in Display (Auto Fullscreen), and the keyboard mode is in Mouse/Keyboard (Keyboard Mode).
Set the Toolbar Behavior and Pinned Buttons
Choose how the toolbar of the web client looks and which buttons it shows at the start of every session.
Toolbar behavior: how the toolbar is displayed during sessions: User’s choice (default), Slide out, Always visible or Hidden. With User’s choice, each user keeps the behavior they chose in the web client. With Slide out, the toolbar leaves a handle on the edge of the screen.
Pinned toolbar buttons: settings shown as buttons in the toolbar of the web client at the start of every session, 8 at most. None by default. Choose them from three groups:
Actions: Ctrl+Alt+Del, Alt+F4 and Release all keys.
Toggles: Immersive mode, Privacy screen, Display layout (Splitscreen and Extended), Mouse mode (Absolute / Relative), Show remote cursor, Hide local cursor, Keyboard mode (Virtual KeyCodes / Unicode) and Stats overlay.
Settings tabs: General settings, Display settings, Mouse/Keyboard settings, USB forwarding and File transfer.
Pin Buttons to the Toolbar
Give your users a ready-made toolbar:
Open Pinned toolbar buttons, then check the buttons to show.
To prevent users from changing them, set the lock next to the field to Locked. With Unlocked, users can still pin and unpin their own buttons.
Save the form.

Toolbar with four pinned buttons: Immersive mode, Release all keys, Alt+F4 and Ctrl+Alt+Del.
In the toolbar, the behavior is in General > Toolbar (Toolbar Behavior). To pin buttons, see Pinning Favorites to the Toolbar.
Allow Features
Choose the features users can use during a session. These options apply whatever the locks.
Allow the privacy screen: lets users blank the remote computer’s own screen while they control it, on Windows and macOS. If you uncheck this option, the web client hides the privacy screen from its settings, its toolbar and its shortcuts.
In the toolbar, see Privacy Screen.