Configure OIDC with Keycloak
This page explains how to integrate Keycloak as an OpenID Connect (OIDC) identity provider to authenticate your users on Reemo.
Note
Configure SSO in Reemo
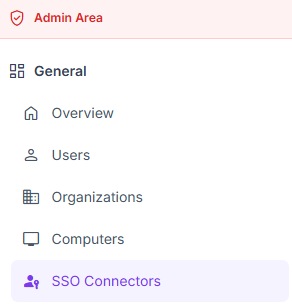
Access SSO Connectors in the instance Admin Area.
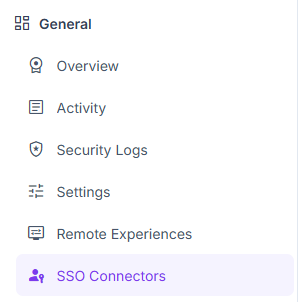
Configure SSO in Organization > SSO Connectors.
Create the OIDC connector in Reemo
From verified_user Admin Area > domain Organizations, select your organization, then go to dashboard General > passkey SSO Connectors and click New Connector > New OIDC Connector.
Enter the Friendly Name (e.g. Keycloak). The Issuer URL, Client ID and Client Secret fields will be filled in after the Keycloak configuration.
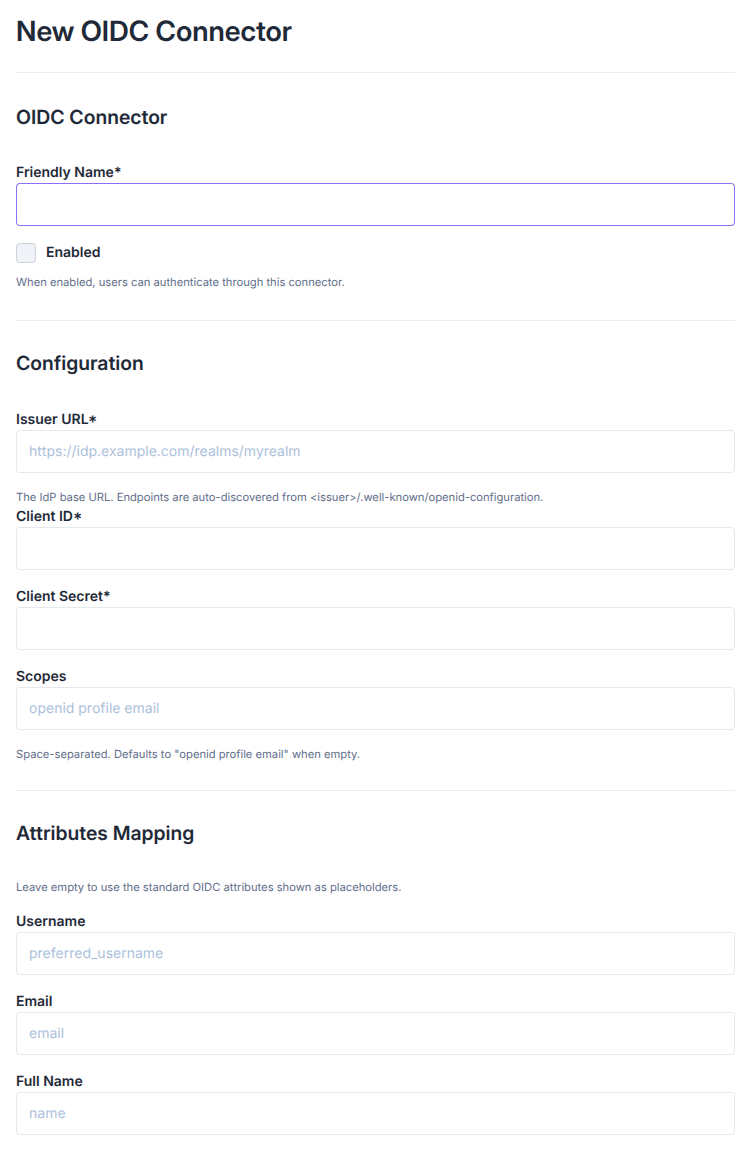
OIDC connector creation form.
Click Create to generate the connector’s callback URL. You will need it in Keycloak.
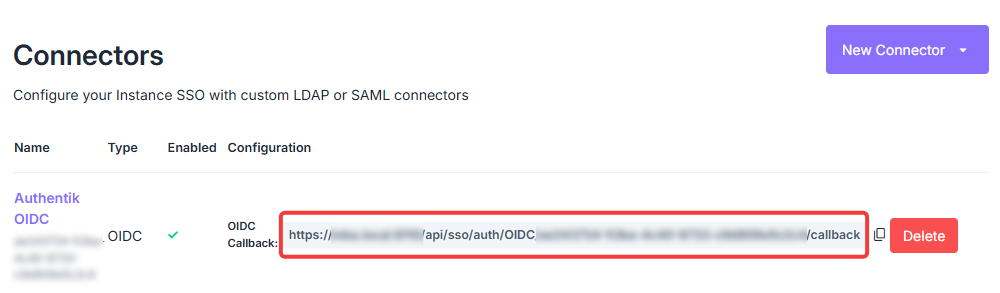
Copy the callback URL generated by the OIDC connector.
Configure the OIDC client in Keycloak
Log in to your Keycloak Admin Console and select the target Realm.
In Clients > Create client, choose OpenID Connect and set a Client ID (e.g.
reemo-api).On the Capability config step:
Client authentication: On (confidential client — Reemo uses a client secret).
Standard flow: enabled (Authorization Code Flow).
In Access settings > Valid redirect URIs, paste the callback URL from the Reemo connector.
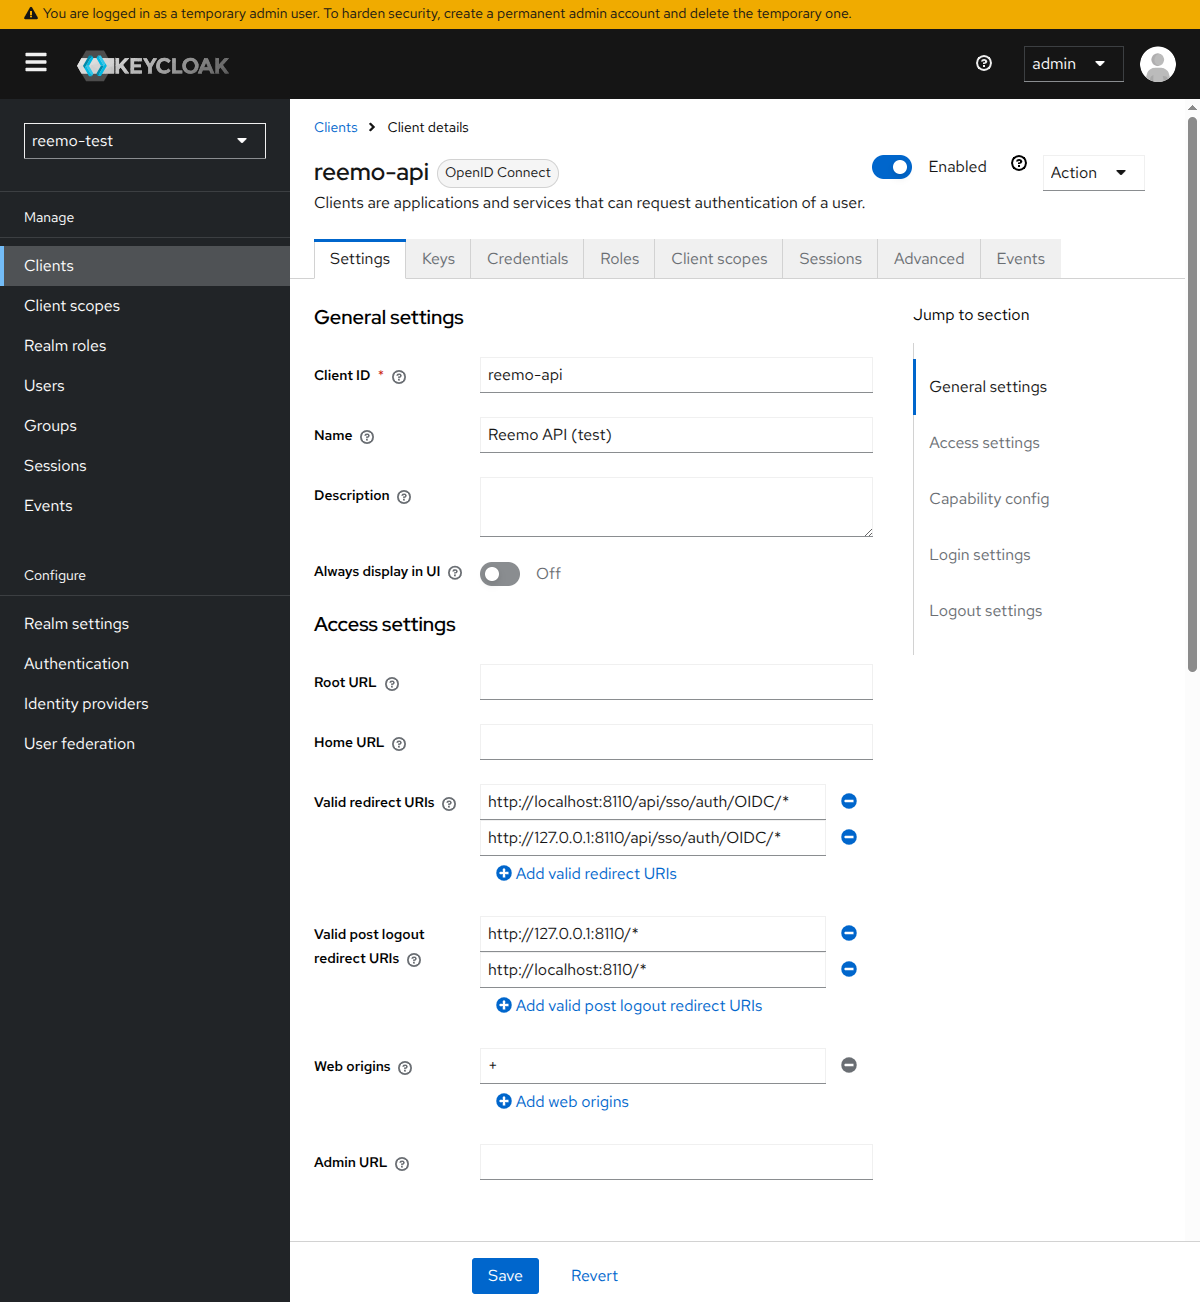
Set the Client ID and the callback URL under Valid redirect URIs.
Open the Credentials tab and copy the Client secret.
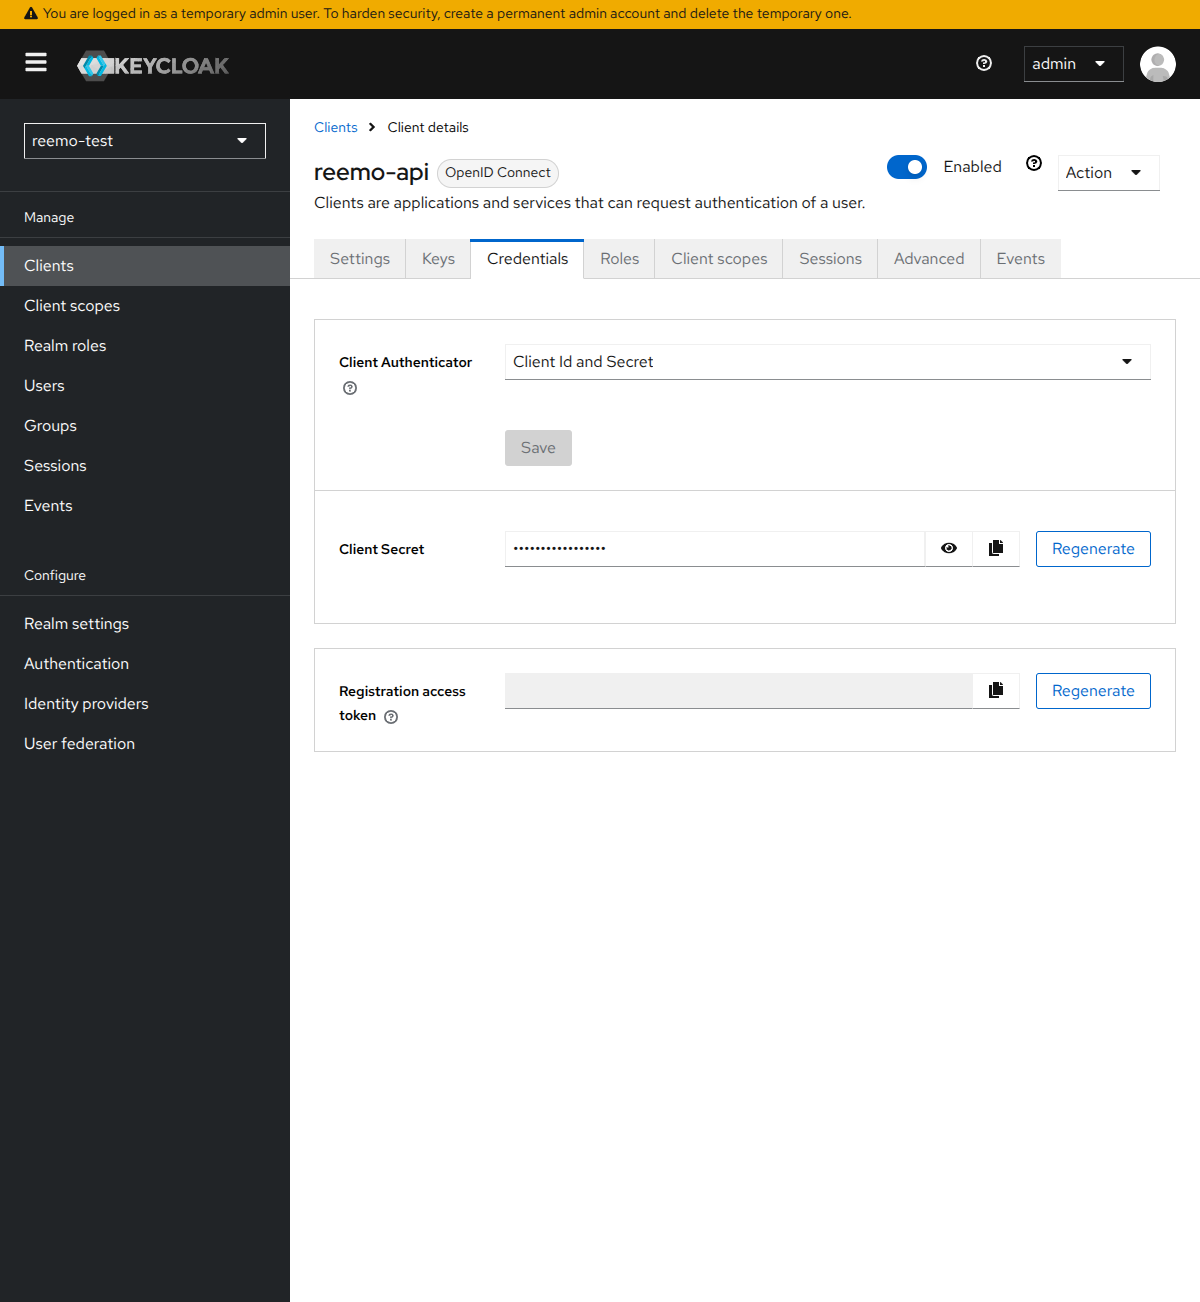
Retrieve the Client secret from the Credentials tab.
Note the Issuer, in the format:
https://[keycloak_url]/realms/[realm]
Complete the OIDC connector in Reemo
Complete the connector with the Keycloak information:
Issuer URL:
https://[keycloak_url]/realms/[realm]. Reemo auto-discovers the endpoints from<issuer>/.well-known/openid-configuration.Client ID and Client Secret retrieved in Keycloak.
Scopes: leave empty to use
openid profile emailby default.Attributes (optional): leave empty to use the standard OIDC attributes (
preferred_username,email,name).
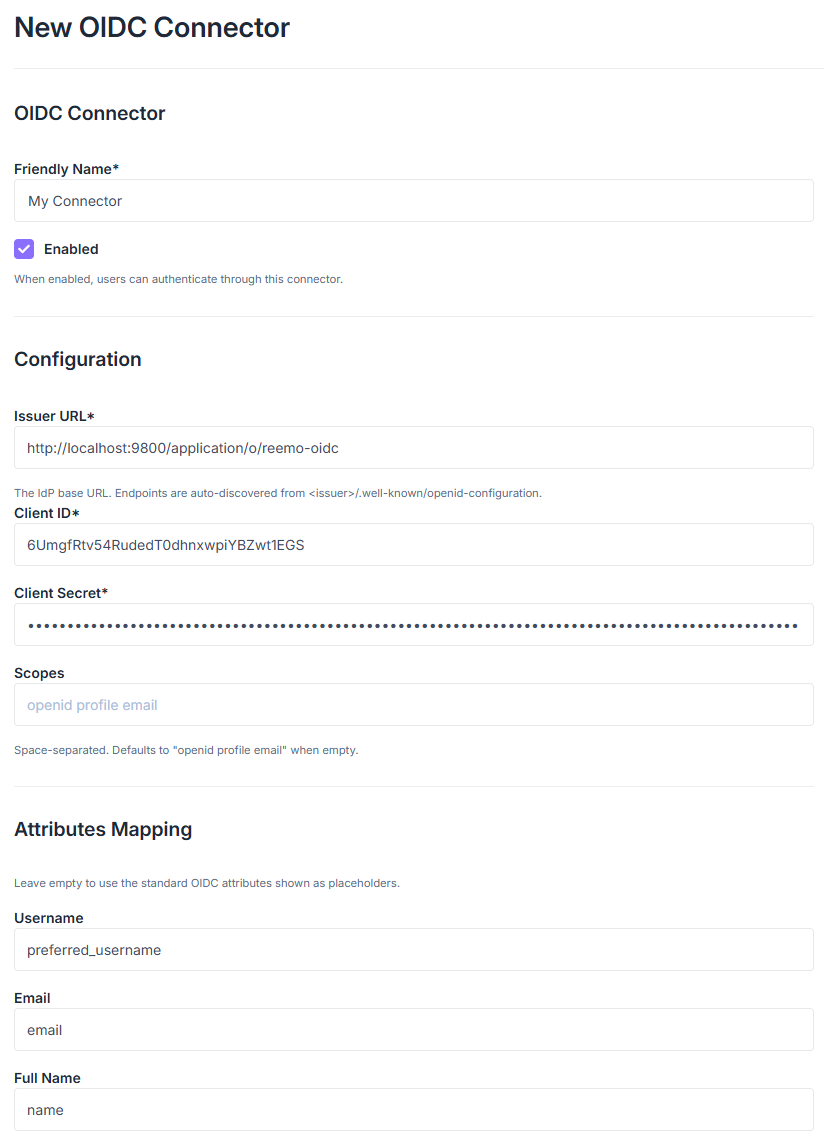
Enter Issuer URL, Client ID and Client Secret, then enable the connector.
Enable the connector (check Enabled) then click Update (or Create) to save.
Declare users
Two approaches are available to grant SSO access to users.
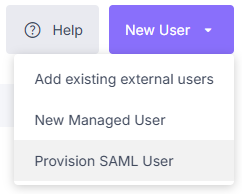
Select Provision SAML User from the New User menu.
The same button provisions both SAML and OIDC users.

Enable Just In Time Provisioning to create accounts on first login.
Manage rights dynamically from the directory
Reemo can read each user’s group membership and automatically assign access to the corresponding collections.
In Keycloak
Open your client (e.g.
reemo-api), Client scopes tab > click the dedicated scope (e.g.reemo-api-dedicated) > Add mapper > By configuration > Group Membership.Configure the mapper:
Name: a label (e.g.
groups).Token Claim Name:
groups.Full group path: Off.
Warning
The Token Claim Name must match the attribute name entered on the Reemo side (groups). In OIDC, Reemo reads the claim exactly under that name (no URI fallback like in SAML).
In Reemo
Open the OIDC connector form (Admin Area > General > SSO Connectors), Extra mapping section.
In the Collection field, enter the group claim name (e.g.
groups), then click Update.
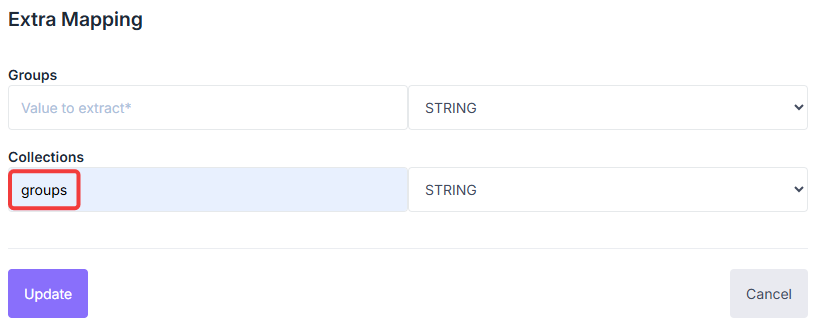
Enter the group claim name in the Collection field of Extra Mapping.
In Inventory > Collections, edit a collection and fill the SSO Mapping Identifier field with the corresponding group name.
Log in via OIDC
Once the connector is active and users are declared (or JIT is enabled), your users select the OIDC tab on the login screen, pick the connector, and are redirected to Keycloak.
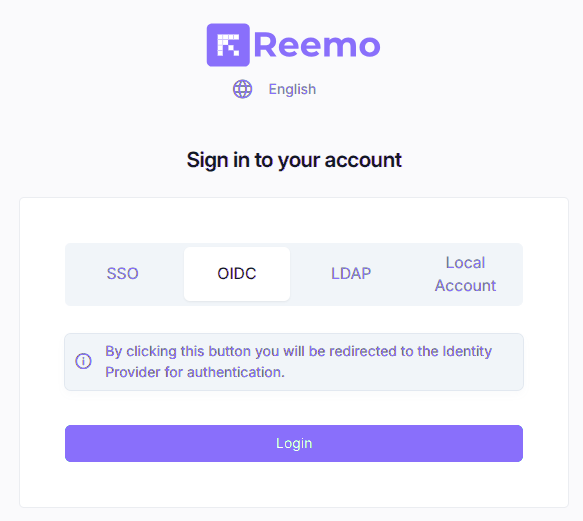
Select the OIDC tab then the connector to be redirected to Keycloak.